Bitlayer Official Bridge Cross-Chain (Bridge-In)
Hello everyone, and thanks for choosing the Bitlayer network! In this guide we will show you a beginner-level tutorial for cross-chain operations on Bitlayer.
As a Bitcoin Layer 2, Bitlayer only supports BTC wallets. Currently, Bitlayer is in cooperation with Unisat Wallet (with more choices to be offered to users in the future). If you have not created a Unisat Wallet yet, you can refer to the Unisat Wallet creation tutorial here: Unisat Wallet Creation Tutorial
Bitlayer is a Bitcoin Layer 2 that is fully EVM-compatible. After linking a BTC wallet (Unisat Wallet) to the Bitlayer network, you’ll also need to link a wallet that supports the EVM chain (e.g. MetaMask/OKX Wallet/Bitget Wallet). If you do not have an EVM wallet, you’ll need to create one. But don’t worry, the creation process is similar to that of the Unisat Wallet and only takes a few minutes.
So before any cross-chain activities, you’ll need to prepare: BTC, Unisat Wallet, MetaMask/OKX Wallet/Bitget Wallet.
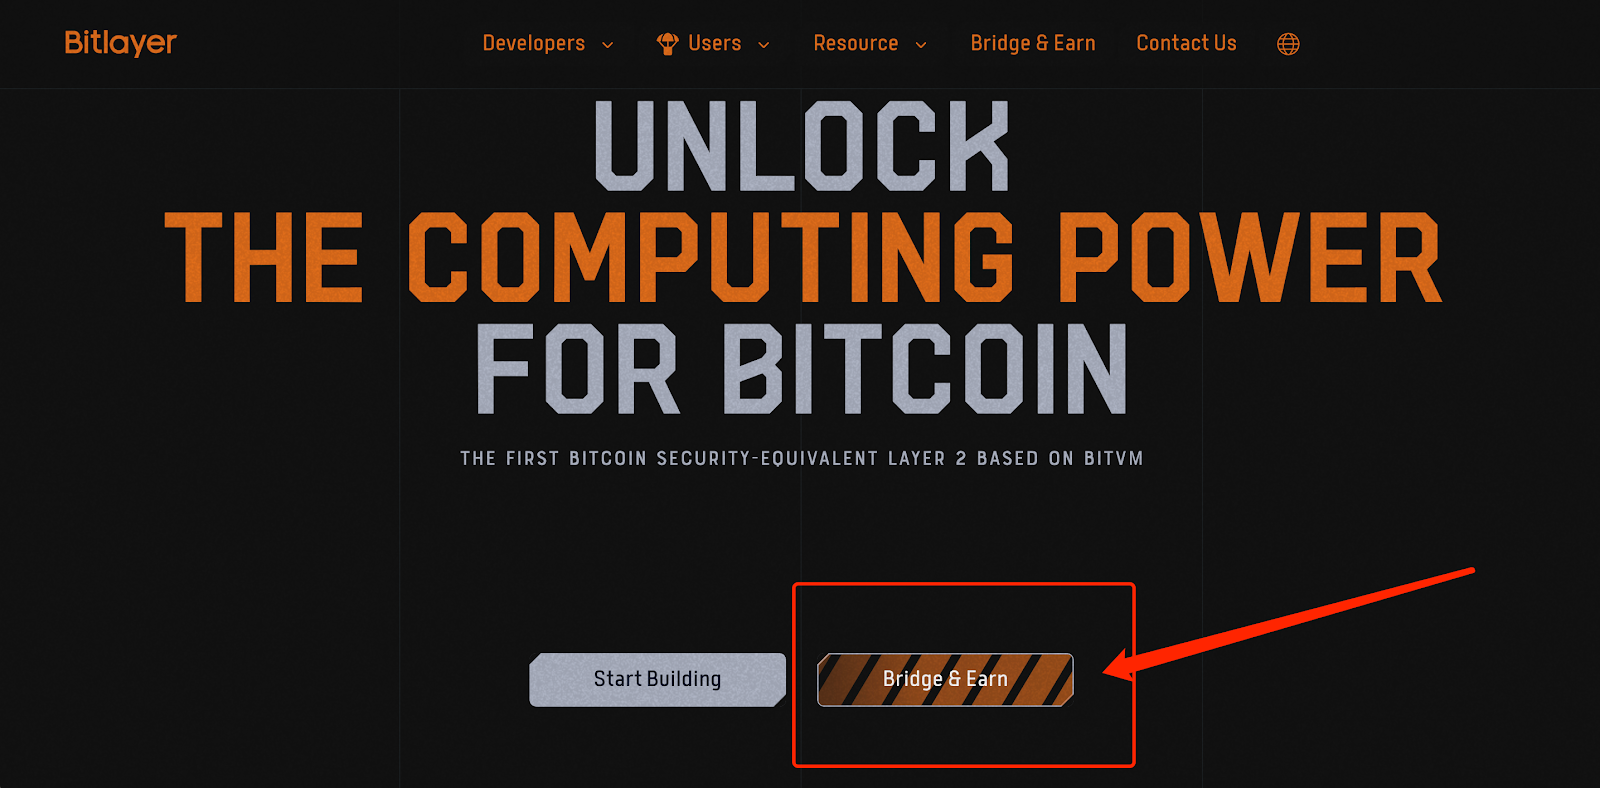
1. Go to the Bitlayer official website: https://www.bitlayer.org/, and click “Bridge & Earn”
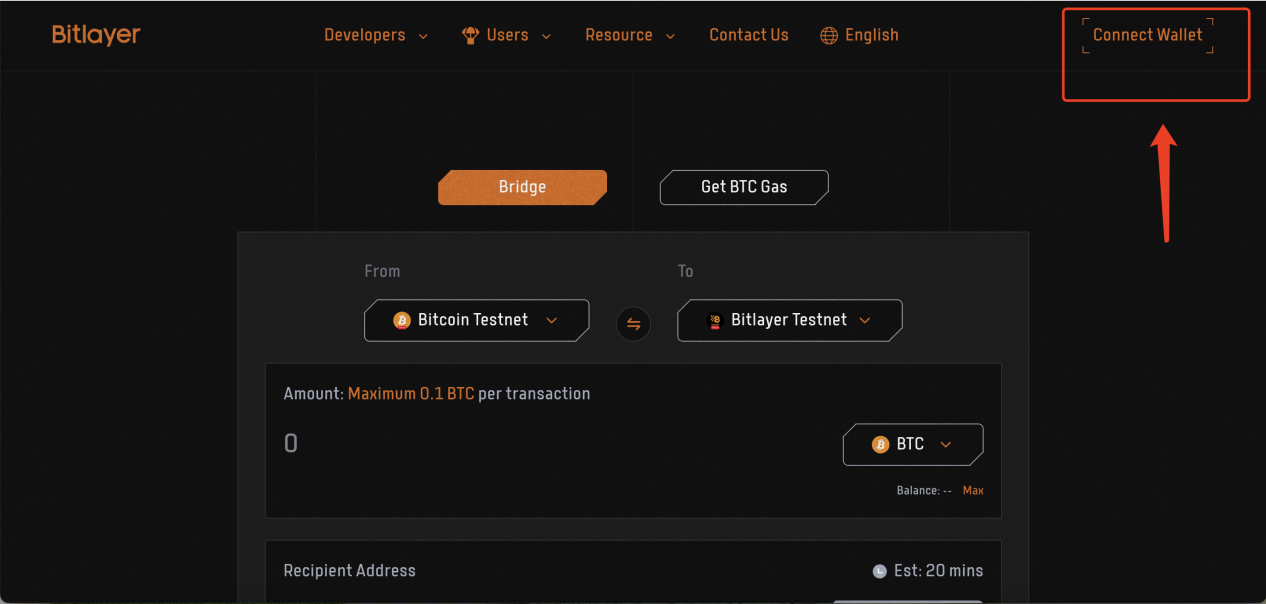
2. Click “Connect Wallet” to connect the wallet
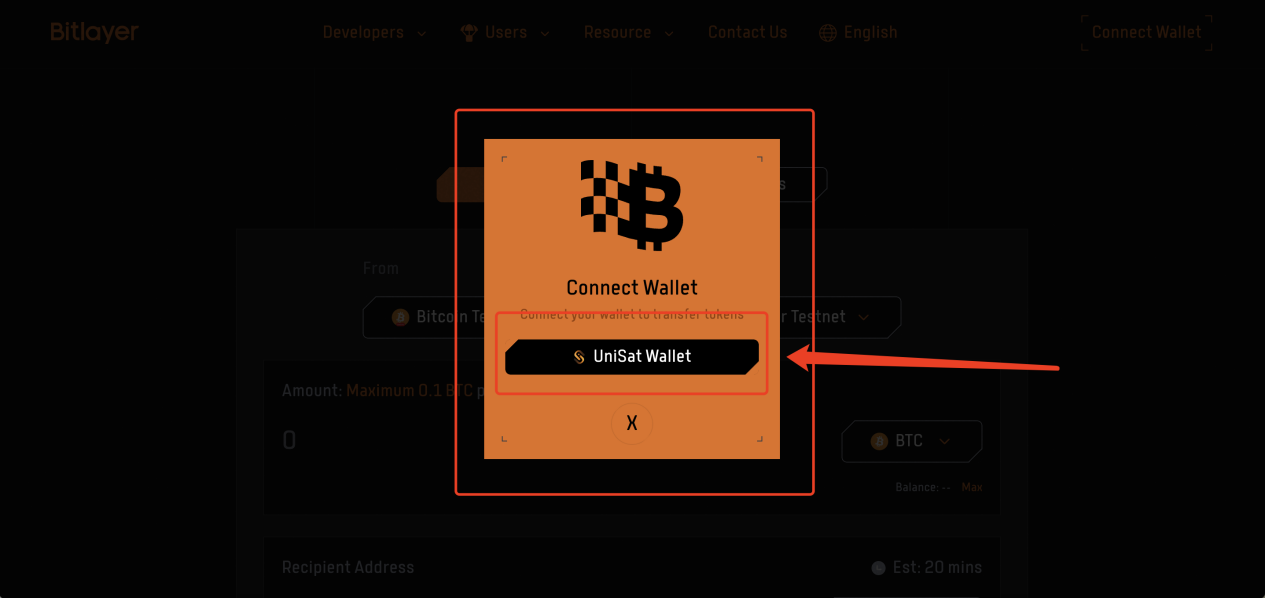
3. Click on “UniSat Wallet”.
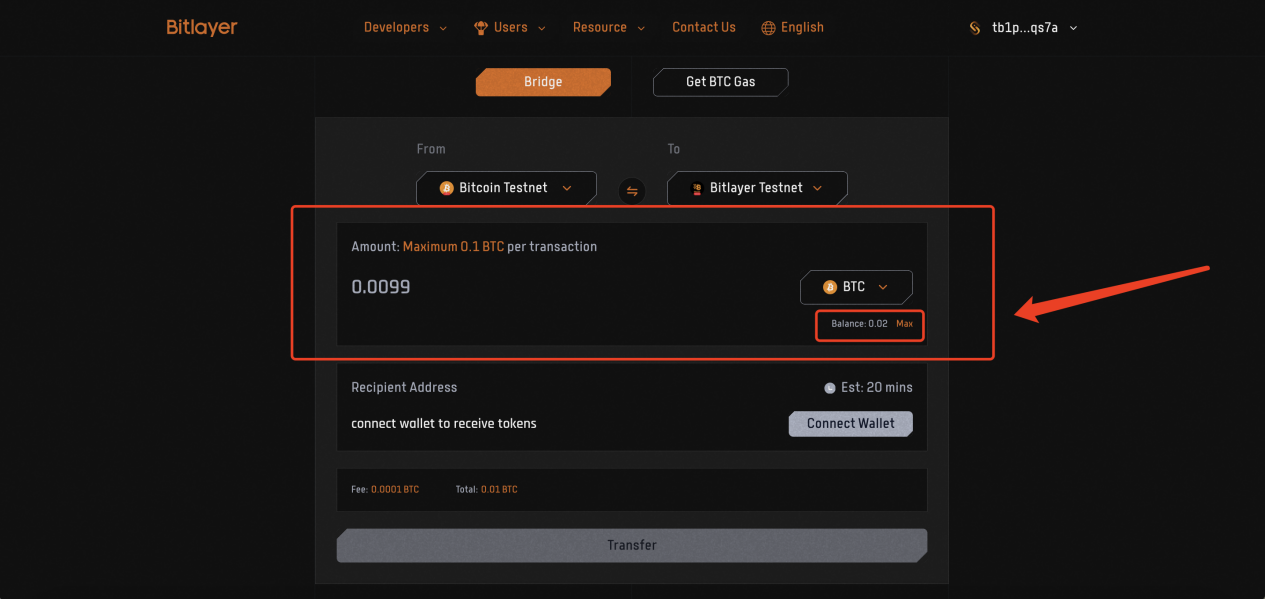
4. After linking the wallet, enter the amount of BTC you want to cross over to Bitlayer.
As a reminder, please check if the BTC balance you have entered meets the following requirements:
(1) Please note that the official Bitlayer minimum entry amount is tentatively set at 0.0005 BTC.
(2) The balance reserves a cross-chain fee (the cross-chain fee is tentatively set at 0.00015 BTC ). To accommodate this fee, note that the amount of BTC you input needs to be less than your total balance.
5. Click on “Connect Wallet” again. Choose your preference for wallet (MetaMask/OKX Wallet/Bitget Wallet).
If you don’t have a MetaMask/OKX Wallet/Bitget Wallet, you’ll need to create one.
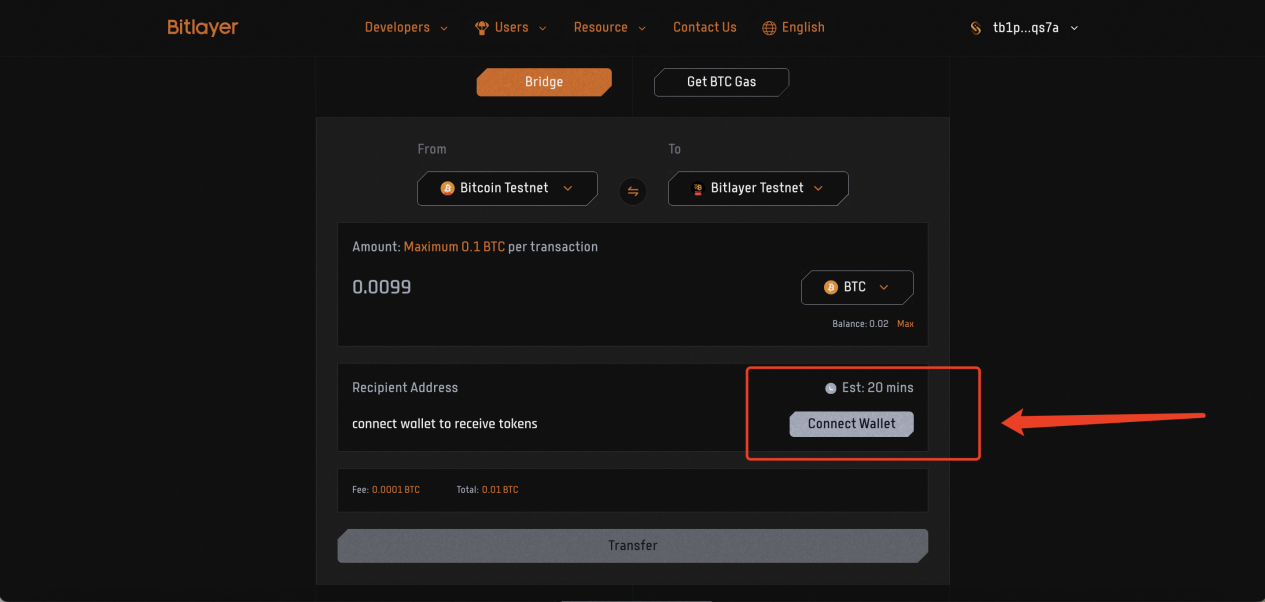
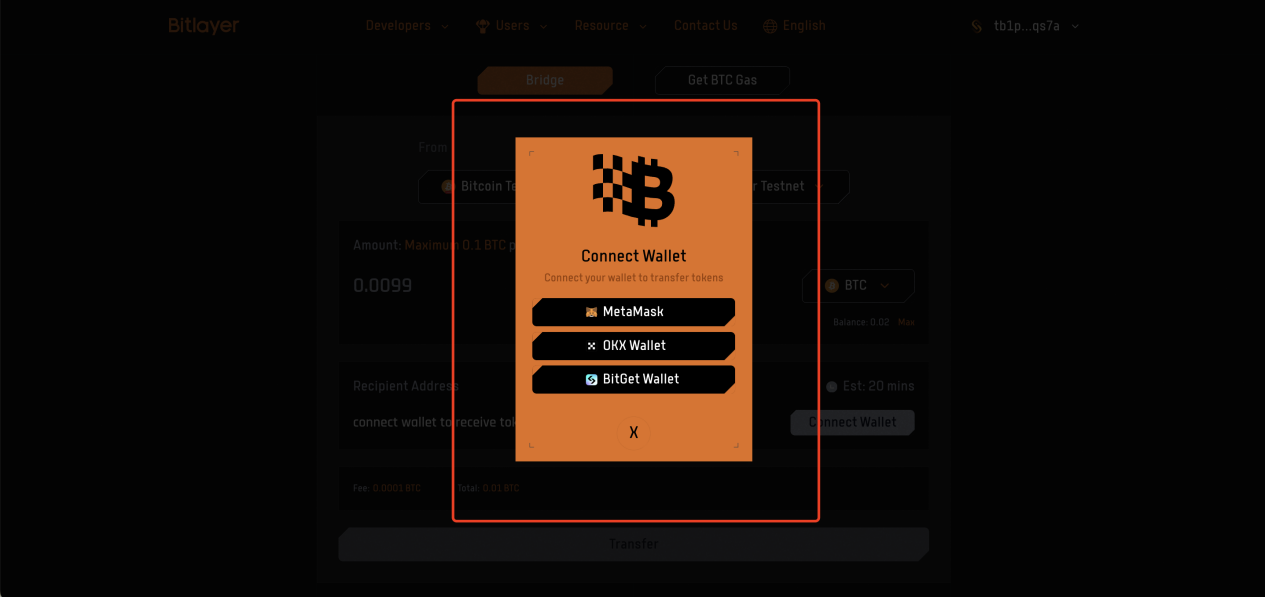
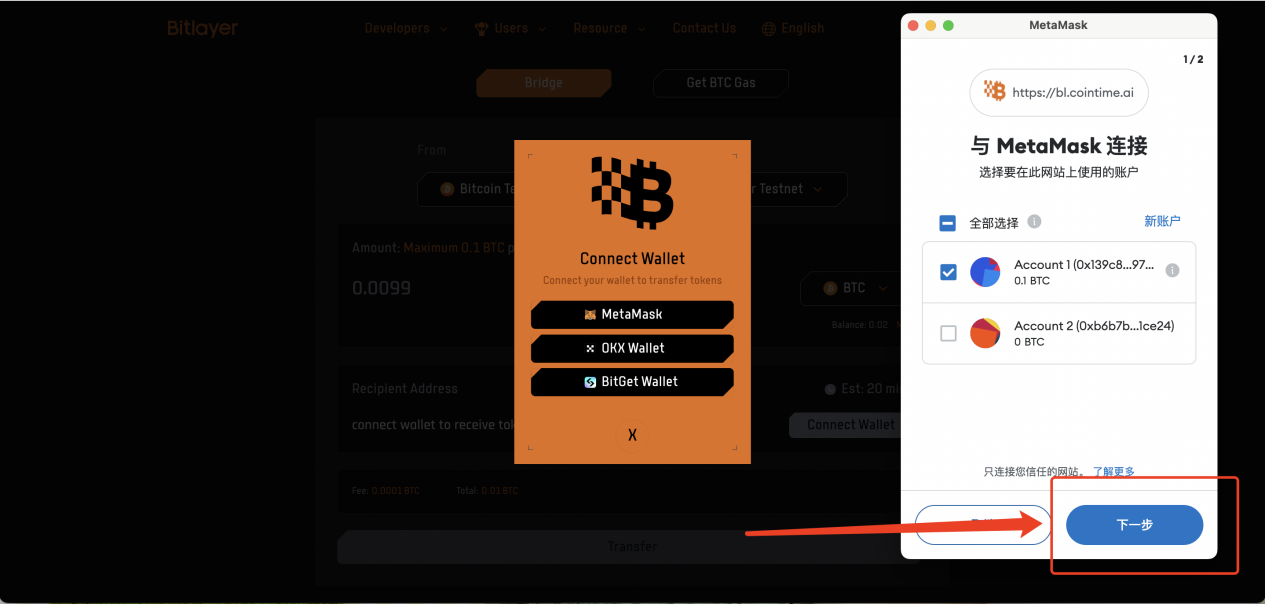
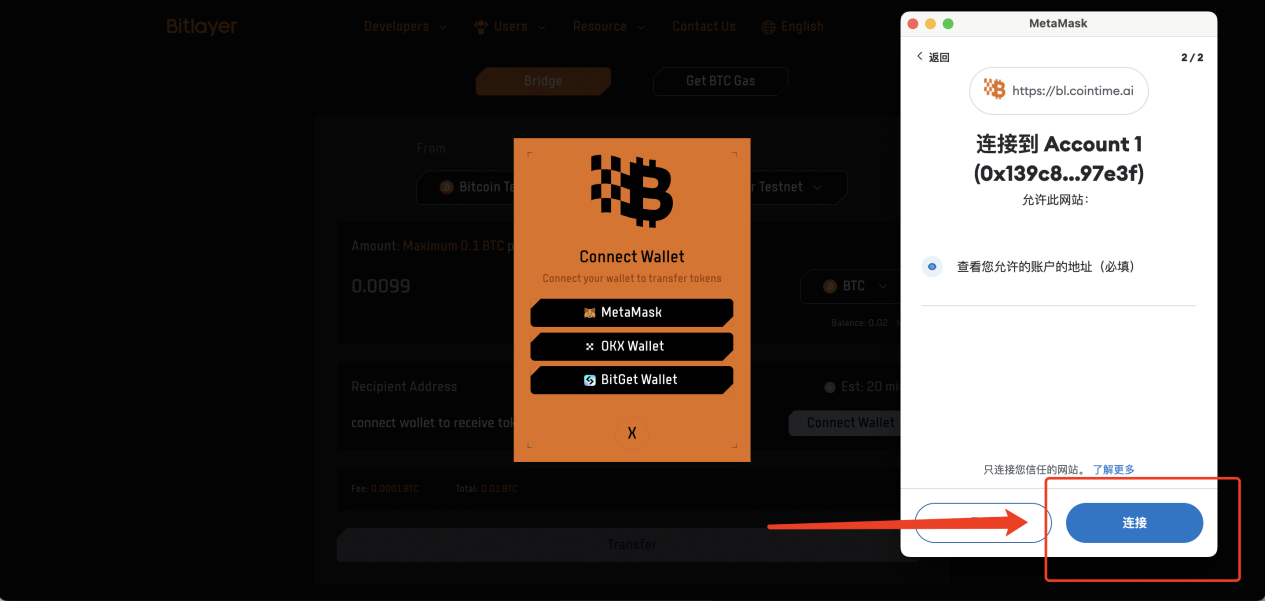
6. In this example, we’re linking our MetaMask wallet. The connection process will be similar for the other wallet options. Continue to click “Next” and then click “Link”.
7. The figure below indicates that the wallet has been successfully connected.
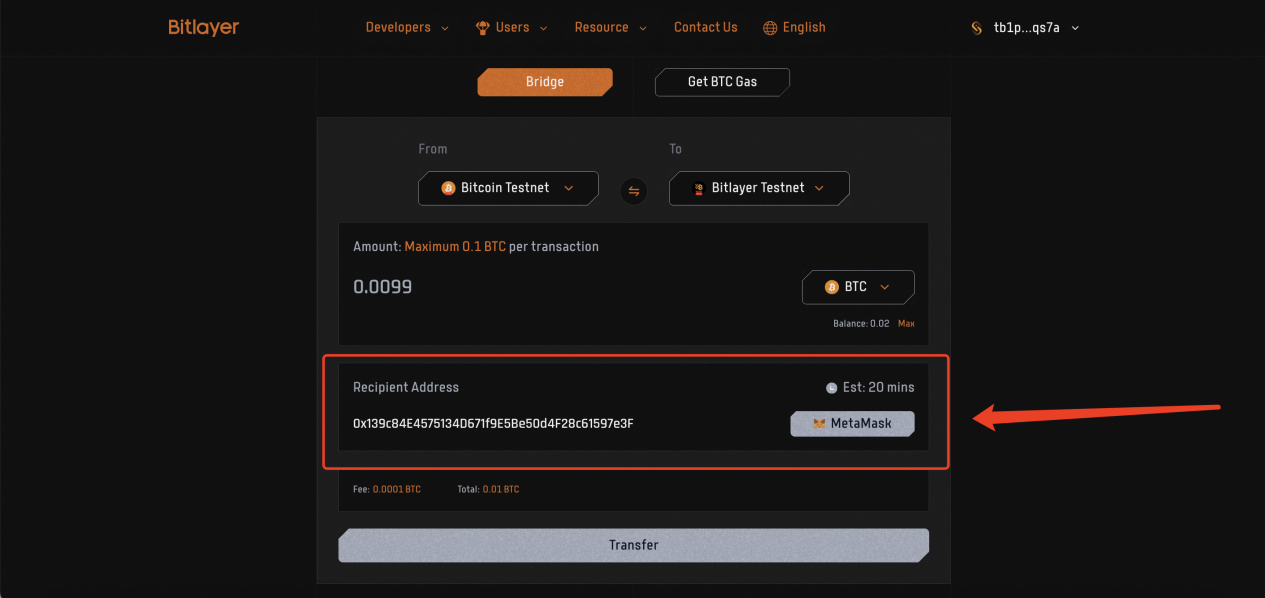
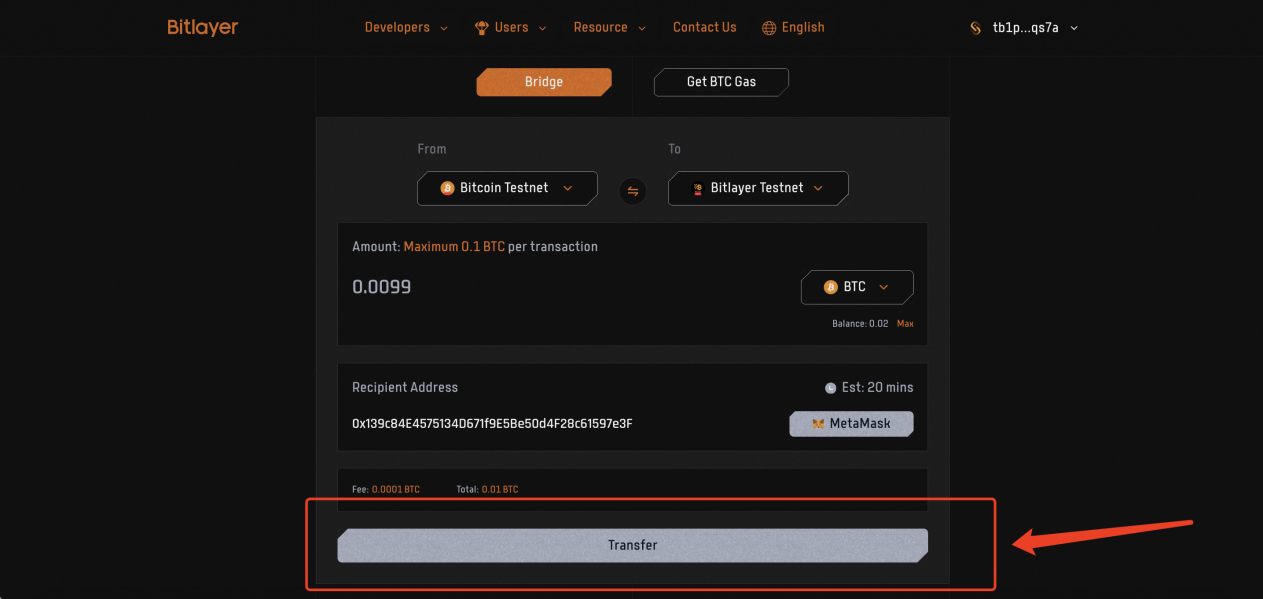
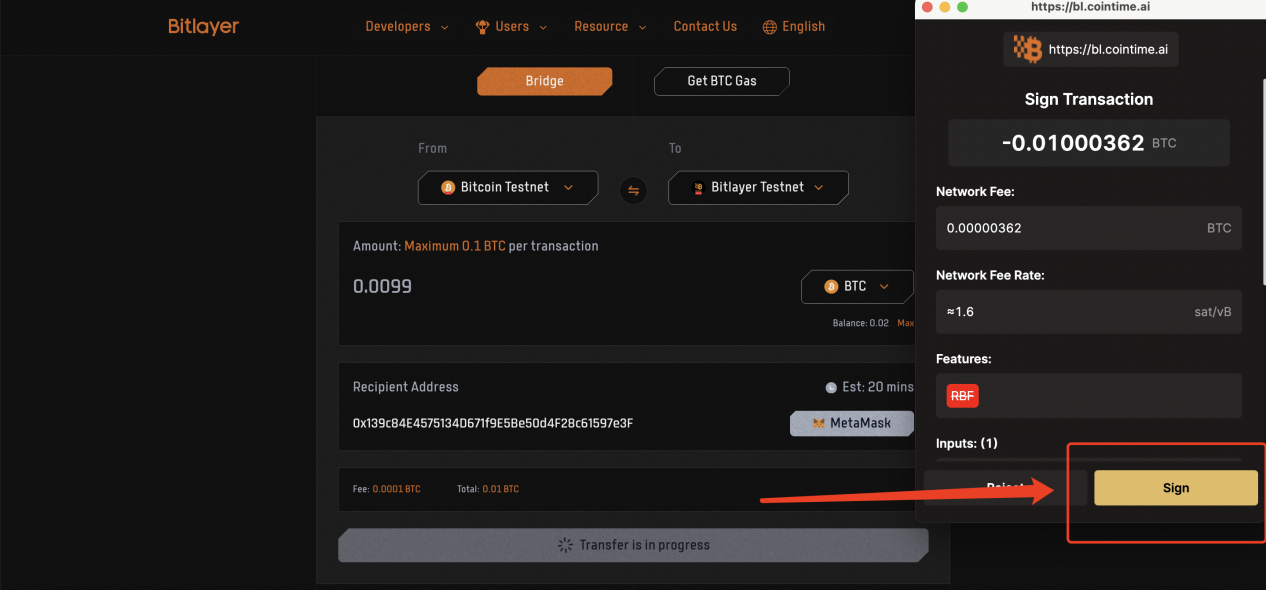
8. Finally, click “Transfer” to bring up the Unisat Wallet extension, and click “Sign” to sign it.
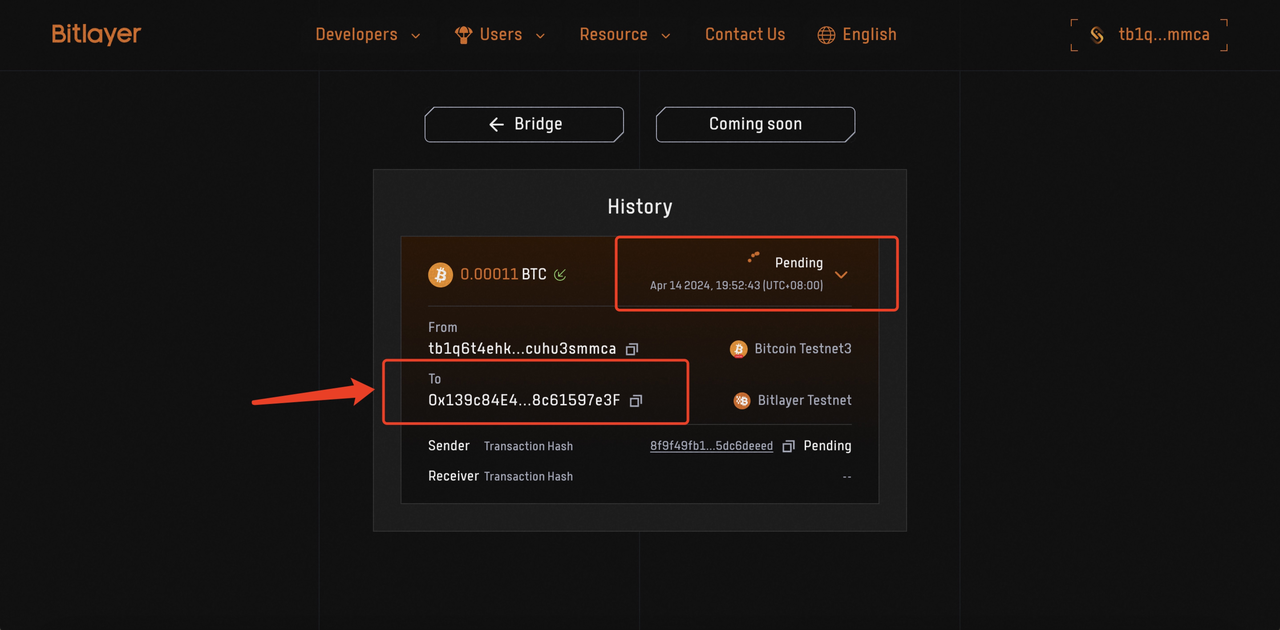
9. After signing, your transaction information will pop up. “Pending” means that this cross-chain transfer is still being processed on-chain. The length of time depends on the degree of congestion on the chain. When “Completed” appears, it means that you have successfully bridged your assets to the chain. The arrow is your BTC address on Bitlayer.
(Note: The transfer amount in this example is 0.00011 BTC, which is for the testing environment and should not be used as a reference. The actual minimum cross-chain amount on Bitlayer is 35 USDT, which is about 0.0003 BTC.)
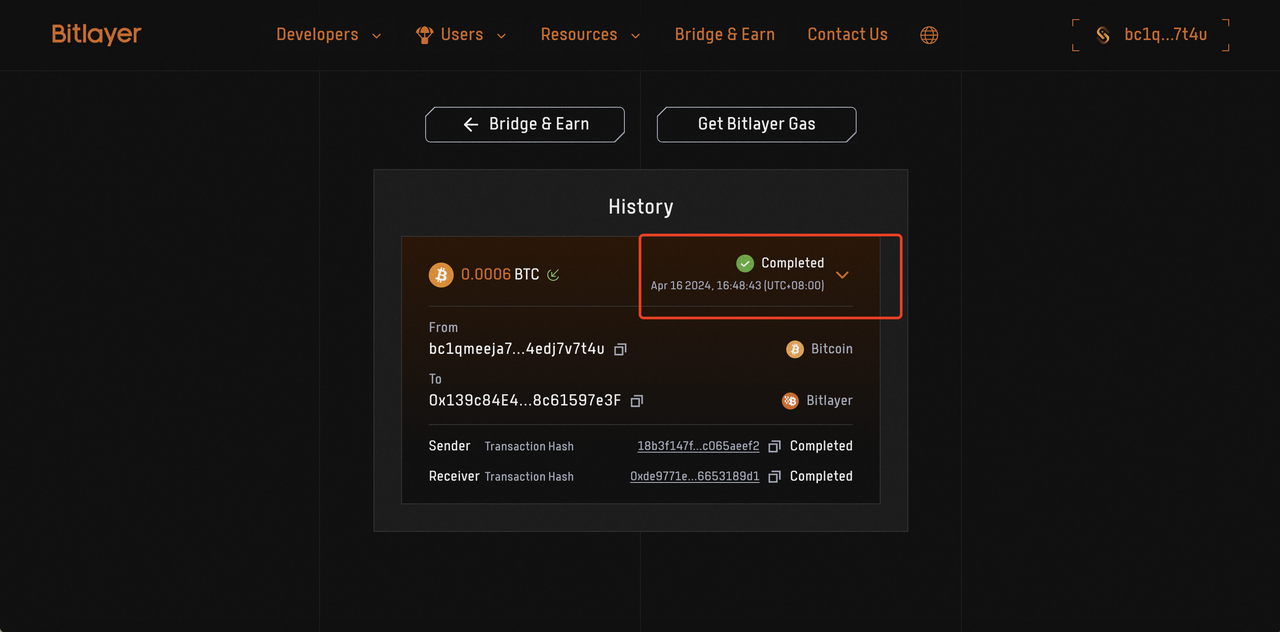
10. And there you have it! Congratulations, you’ve successfully bridged your BTC and unlocked a new era of Bitlayer and BTC!
In addition, the official Bitlayer cross-chain bridge currently only supports BTC. We are developing support for more assets in the future.
Follow us to stay updated on everything Bitlayer:
Website | Twitter | Discord | Medium | Github | Youtube
Note:Be diligent to identify BItlayer’s unique domain name when bridging your assets. Beware of fraud, and access all official links through Bitlayer’s socials: https://www.bitlayer.org/
